Use Linux Terminal on Android

With a wide range of apps, Android users can use the power of Linux in ways that aren’t possible with other mobile computers.

Termux is a well-known name in this field, but there are other options that are also very good.

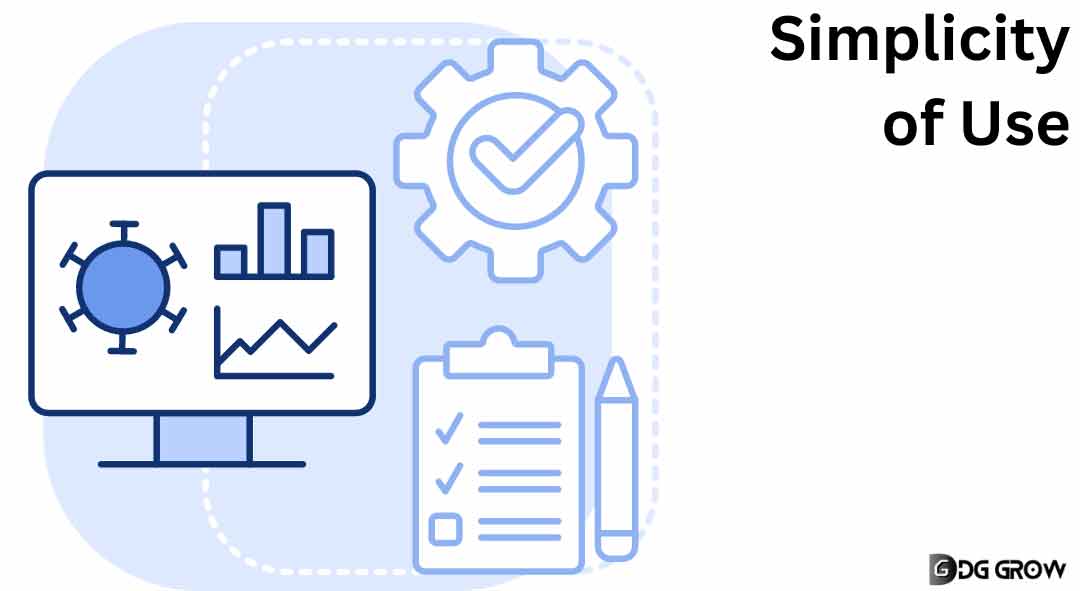
We’ll talk about Linux Terminal on Android and answer some common questions users may have in this piece.

List of Linux Terminal on Android

Termux

Linux Terminal on Android

An app for Android that lets you use a powerful terminal emulator and Linux system.

Follow US: Google News

Important Features:

    • A lot of different Linux tools.
    • Can be accessed without having root access.
    • Able to run code written in Python, PHP, and Ruby.

Pros:

    • Very flexible and full of features.
    • Updates often and a strong group.

Cons:

    • Because it focuses on the command line, it can be hard for beginners.
    • Some advanced features might need more time to learn.

linux terminal on android

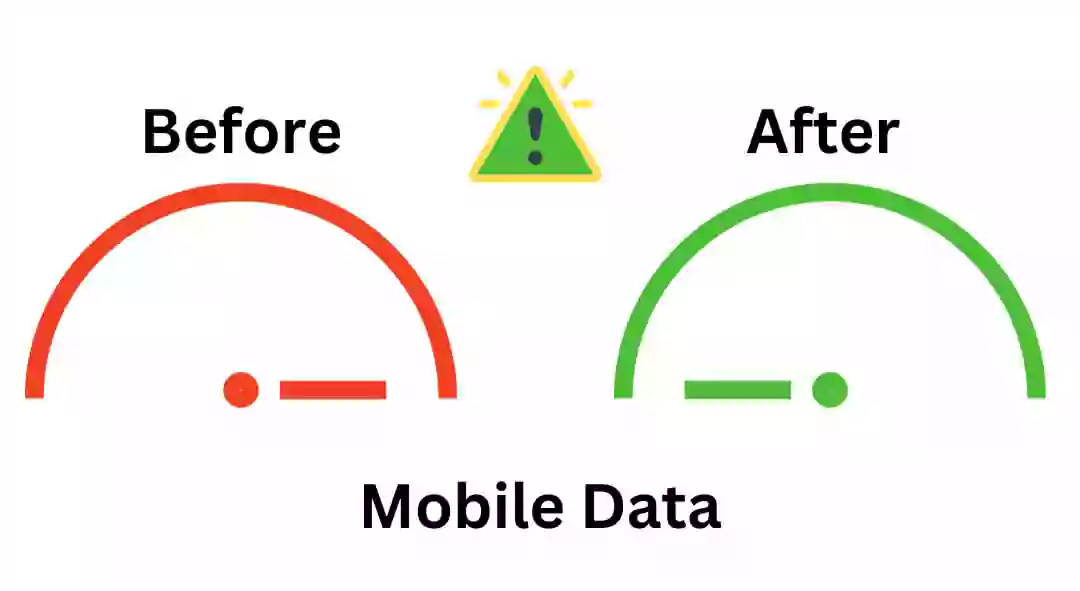
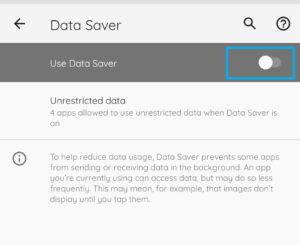
👉 How to Save Mobile Data on Android

👉 How To Send big file through Gmail in 2023

UserLand

Linux Terminal on Android

UserLand gives Android a Linux-like environment with lots of features without needing root access. It works with several types of Linux, such as Ubuntu, Debian, and Alpine.

Important Features:

    • It’s easy to set up Linux versions.
    • Comes with both a command line and a graphical UI.

Pros:

    • Easy to use, especially for people who are new to Linux.
    • Offers both CLI and GUI.

Cons:

    • It might not work as well as Termux for some jobs.
    • The setup process is more complicated for some changes.

linux terminal on android

Andronix

Linux Terminal on Android

Andronix adds a Linux environment to Android and provides different versions such as Ubuntu, Debian, Manjaro, and Fedora.

Important Features:

    • A number of different Linux versions.
    • OS versions that have been modified to make them work better.
    • Works with both VNC and SSH.

Pros:

    • Works with different versions of Linux.
    • Can make the experience more like using a PC.

Cons:

    • Some functions can only be used with a paid subscription.
    • More resources are used because of GUI features.

linux terminal on android

👉 10 Best Ways To Identifying and Defending Mobile Hacking

👉 9 Best Mobile Apps for Booking Air Tickets for Seamless Journeys

GNURoot Debian

Linux Terminal on Android

With GNURoot Debian, you can run Debian Linux on an Android device without having to be a root user.

Important Features:

A system with Debian Linux. Many Linux programs can be used with it.

Pros:

    • Easy for people who already know how to use Debian.
    • Easy to use, doesn’t need any complicated setup.

Cons:

    • Only works with Debian.
    • The user design and experience are not as well polished.

AnLinux

Linux Terminal on Android

AnLinux can turn your Android device into a Linux workstation. It works with many different Linux distributions and desktop settings.

Important Features:

    • More than one Linux version.
    • It lets you run desktop settings through VNC.

Pros:

    • Flexible support for desktops and sharing.
    • It works well with Termux.

Cons:

    • More setup for desktop settings.
    • Performance changes depending on the gadget.

linux terminal on android

👉 6 Steps World’s Best Free the Power of ProtonMail Account

Linux Deploy

Linux Terminal on Android

Linux Deploy is for more experienced users and gives you a full Linux system on your Android device.

Important Features:

    • A lot of different Linux versions.
    • A lot of ways to customize.

Pros:

    • Can be changed a lot for advanced people.
    • A number of different Linux versions.

Cons:

    • Not as good for beginners.

linux terminal on android

FAQs

Q1: Can I use Linux Terminal on Android phone or tablet without breaking it?

A: You can run many Linux Terminal without having root access if you use programs like Termux and its alternatives.

Q2: Are these apps good for people who are just starting out?

A: Termux might be hard for beginners to learn, but there are other options like UserLand that have easier-to-use platforms with GUI support.

Q3: Can I use these tools to make things?

A: Of course. Because these apps let you run scripts written in languages like Python, they are good for programming work.

Q4: How do these apps compare in terms of how much resources they use?

A: Some apps, like Termux, use very few resources, while others, like Andronix, may use more because they have more GUI features.

Q5: Do I need to be connected to the internet to use these apps?

A: Yes you need to connected with internet, but some features can be use offline.

While Termux is known for being flexible and having a strong community behind it, other options like UserLand, Andronix, GNURoot Debian, AnLinux, and Linux Deploy offer different features to meet the needs of users of all skill levels. Which one to use depends on things like the user’s chosen Linux distribution, whether they need a graphical interface, and how comfortable they are with Linux environments.

Best Mobile Expense Tracker Apps

It’s important to keep a close eye on costs. This saying “beware of little expenses” is more true than ever. But in a cashless world, you need the right tools to keep track of all. Here is Best mobile expense tracker app that can help you stick to your budget and stay financially responsible.

Going cashless and how it will affect things The switch from cash to digital activities has changed how we handle our money.

Online payments are convenient, but they can also cause people to spend more than they mean to. This shows how important it is to have good digital expense control tools.


Why Should You Use Expense Tracker Apps?

Traditional planning tools have been replaced by apps that keep track of expenses for several strong reasons:

  • They let you plan and track your budget in real time.
  • Put all of your expenses in one place to make keeping track of them easy.
  • Sort and study your spending to learn more about your money.
  • Make it easier to plan for the future with money.
  • Let people share cash information so that team budgeting can happen.
  • Let you compare current costs with earlier info to see if there are any trends.

Top Mobile Apps for Tracking Expenses

 “Money Manager Expense & Budget”

The best thing about Money Manager is that it gives you a clear picture of your finances.

Mobile Expense Tracker Apps

Key Points:

  • It’s free and easy to use.
  • Detailed and easy-to-see data.
  • Doing double-entry records to be sure.
  • Keeping track of assets and liabilities.
  • Using different currencies around the world.
  • Customizable sections let you make your own budget.
  • Safe ways to back up and restore files.

Mobile Expense Tracker Apps

Mobile Expense Tracker Apps

“Wallet – Budget Expense Tracker”

You can use wallet in many ways to help you stick to your spending plan and reach your financial goals.

Mobile Expense Tracker Apps

Key Points:

  • Cloud syncing across devices.
  • Make your own categories to fit your income.
  • Live exchange rates for multiple currencies.
  • Automatic bank sync to get information on transactions in real time.
  • Charts that you can interact with to look at buying trends.
  • Setting and keeping track of financial goals.


Mobile Expense Tracker Apps

Mobile Expense Tracker Apps

👉 Read Also Install an Antivirus: Key Considerations

👉 Read 05 Perfect ways to Effectively Block Spam Messages on Instagram

“Buddy: Budget & Save Money”

Buddy is a popular way to keep track of personal expenses because it is easy to use and looks good.

Mobile Expense Tracker Apps

Key Points:

  • Easy exchange of transactions.
  • The ability to split transactions so that costs can be split.
  • Detailed pictures of how much money is being spent.
  • Budgets that can be changed for different types of spending. – Keep various devices in sync.
  • An easy-to-use interface with simple movement.

“Spending Tracker”

Spending Tracker is the best choice for people who like tools that are easy to use and get the job done.

Mobile Expense Tracker Apps

Key Points:

  • As many transactions as you want. Logging expenses is quick and easy.
  • Strong protection to keep financial information safe.
  • Financial charts that are easy to read and give useful information.
  • The ability to set up recurring transactions for regular costs.
  • The choice to roll over your budget for flexible budgeting.

👉 Read Top 10 Mobile Video Editing Apps for Making Beautiful Videos

👉 Read Quick Guide to Opening a New Gmail Account

“Rydoo”

Rydoo is meant to make it easier for professionals and businesses to keep track of their expenses.

Mobile Expense Tracker Apps

Key Points:

  • Scanning receipts and reporting expenses in real time.
  • Workflow for approval for managing business expenses.
  • Daily allowance and keeping track of miles.
  • Multiple person access so that a team can work together.
  • It works with accounting tools.
  • Expense groups that can be changed to support detailed tracking.

👉 Also Read Apps for Booking Air Tickets
9 Best Mobile Apps for Booking Air Tickets for Seamless Journeys

“Axio Expense Tracker & BNPL”

Axio is known for having a lot of features and an easy-to-use layout.

Mobile Expense Tracker Apps

Key Points:

  • Tracking expenses through SMS for ease of use.
  • BHIM UPI integration makes transfers easy.
  • Don’t forget to pay on time to avoid late fees.
  • An ATM tracker to get cash quickly.
  • Sorting expenses into groups for better money management.
  • The ability to back up and restore info to keep it safe.

Why using expense trackers is a good idea These apps make it easier to keep track of spending because you don’t have to keep paper records.

They also show you how your money is being spent. They help people make smarter choices about their money and develop better saving habits.

FAQs

Q: Can I use these apps to keep track of my foreign spending?

A: Yes, apps like Money Manager and Wallet can handle more than one currency, which makes them perfect for keeping track of foreign expenses.

Q: Can I share my financial information between devices?

A: A lot of these apps, like Wallet and Buddy, let you view your data from any device by syncing it with the cloud.

Q: How safe are these tools for keeping track of expenses?

A: These apps put user data protection first. But to be sure, it’s a good idea to look over each app’s security steps.

Q: Can businesses use these apps to keep track of their spending?

A: Yes, Rydoo can handle both personal and business expense tracking needs efficiently.

Keeping track of your spending is important for your financial health in this digital age.

Mobile apps that track expenses are a useful option because they are easy to use and have a lot of features. Selecting the appropriate app can help you effectively handle your money and effectively save.

Install an Antivirus: Key Considerations

These days, cyber threats are getting smarter, so installing an antivirus is very important to keep your personal and business info safe. But before you start to install an Antivirus, there are a few important things you should think about to make sure you pick the right safety for your devices.

Here are 7 very important things to remember before install an Antivirus:

1. “Compatibility with Your System”

Install an Antivirus

Check to see if the protection software works with your operating system before you install it.

If your security program doesn’t work with your computer, it could cause your system to become unstable, crash often, or not protect you at all because it can’t get updates.

Check the antivirus software’s system needs to make sure they match the requirements of your device.

2. “Important Level of Safety

Install an Antivirus

Before you install an antivirus, you should think about how much safety you need.

You might need a more powerful solution with advanced features like real-time protection, anti-phishing, and anti-ransomware if you deal with private information or money on a regular basis.

A simpler security program might be enough for basic use.

👉 Exploring the Top 10 Web Browsers and Their Unique Features

👉 How to find deleted WhatsApp messages

3. “Impact on Performance”

Install an Antivirus

Think about how it will affect the way your system works.

Some antivirus apps are known to slow down devices by using a lot of resources.

Look for software that strikes a balance between good security and fast speed so that you can keep using your device without it slowing down a lot.

4. “Simplicity of Use”

Install an Antivirus

A protection program should be easy to use.

If the software is too hard to understand, you might not use it to its full potential.

Before you run an antivirus, look at how easy it is to use and how the interface works.

You want software that makes it easy to find your way around its features, run scans, and understand its alerts.

5. “How Often You Update”

Install an Antivirus

It is very important that the antivirus program can regularly update itself.

Your antivirus needs to be able to keep up with the new viruses and bugs that come out every day.

Before you install an antivirus, find out how often it changes its virus definitions and make sure that it does this automatically so that you are always safe.

👉 6 Steps World’s Best Free the Power of ProtonMail Account

👉 10 Best Ways to Identifying and Defending Mobile Hacking

6. “Customer Service”

Install an Antivirus

Good customer service can be very helpful, especially when you’re having problems.

Check to see how much help the antivirus company gives.

Support that is good includes easy ways to get in touch, like email, phone, or live chat, and a large knowledge base that can help you fix problems quickly.

7. “Value vs. Cost”

Install an Antivirus

Lastly, think about how much the antivirus costs compared to what it does.

There are free choices, but they might not offer as much protection or as many features as paid versions.

Figure out how much you can spend and then compare the features of different antivirus programs to help you make a choice.

If you take the time to think about these seven things before you install an antivirus, you will be in a much better position to pick the right one to protect your digital life.

Cyberthreat can be annoying and hurt you, but the right antivirus can protect you. Pick wisely and stay safe.

Quick Guide to Opening a New Gmail Account

Big File Through Gmail

Well! Gmail is a well-known email service from Google that lets you send and receive emails, photos, and other things. It’s free and easy to use! But how to open new Gmail account?

Open New Gmail Account

To open your own new Gmail account, just do these easy steps:

Visit the Gmail site:

To open new Gmail account, get your computer, tablet, or phone and launch the web software you like. Type gmail.com into the search bar. Wait for the Gmail page to load after you press “Enter.”

Click on the “Create Account”:

Open New Gmail Account

Find a button that says “Create account” on the Gmail page. People write their email address and password under the sign-in box most of the time. To begin, click on that button.

👉🏼 Exploring the Top 10 Web Browsers and Their Unique Features | DG Grow

👉🏼 30 Practical Google Chrome Extensions: A Mix of Free and Paid | DG Grow 

Fill out the form:

Open New Gmail Account

Open New Gmail Account

You’ll see a form with spaces for you to type in your own details. To keep your emails safe, you need to enter your first and last name, the email address you want (like “yourname@gmail.com”), and a password.

Open New Gmail Account

Pick a password that is hard for other people to figure out but not too hard for you to remember.

Phone or Email recovery:

Open New Gmail Account

Gmail will sometimes ask to see your phone number to make sure you’re not a robot. Don’t stress, it’s simple! Type in your phone number if they ask. A text message with a code will be sent to you. To show you’re real, type that number into the box on the screen.

Open New Gmail Account

👉🏼 How to Save Mobile Data on Android | DG Grow

👉🏼 How To Send big file through Gmail in 2023 | DG Grow

Agree to the terms:

Open New Gmail Account

Terms of Service” are Gmail’s rules that you will see after you put in your information. If you agree to follow the rules, read them over and click the “I agree” button.

Pick up your new email:

There you have it! You’ve followed all the steps. You can now see your new Gmail account. That’s where all of your emails will be. You can save pictures, send emails to your friends, and do a lot more.

Make your account unique:

You can change how Gmail looks if you want to. There is a wheel in the upper right spot that you can click to change colors, add a fun background, or sort your emails in a different way.

Excellent work! You now know how to open new Gmail account. That was so easy, right? Now you’re ready to send emails to everyone. Have fun with your new Gmail account!

FAQs:

Is it free to sign up for Gmail?

Yes, making a Gmail account is totally free. It’s free to send and receive texts with Gmail.

Is it possible to make a Gmail account on my phone?

Of course! Your smartphone is one example of a gadget that can connect to the internet and set up a Gmail account. You can get the Gmail app from your phone’s app store or go to the Gmail website on your phone and follow the steps to sign up.

What should I do if the Gmail address I want is already taken?

If the email address you want is already taken, Gmail will offer other addresses that are free. You can choose one of those or make your own by adding periods or numbers to the name you want.

Do I have to use my real name when I sign up for Gmail?

If you’re using the account for business or public purposes, it’s best to use your real name, but it’s not required.

What should I do if I forget my Gmail password?

The “Forgot password?” link on the sign-in page will let you change your password if you forget it. To get a restart link or code, you’ll need to use the recovery email address or phone number you set up when you made the account.

When you start your account, make sure you set up recovery options. This way, if you need to, you can easily change your password.

How to Save Mobile Data on Android

Now that everyone has a smartphone, mobile data is just as important to our daily lives as power. But when you have good access, you use a lot of data, which can cost a lot.

You’re not the only one who has ever run out of data before the end of their billing term.

There are a lot of settings and tools on Android phones that can help you save mobile data. 

Here’s your guide to saving mobile data on your Android mobile.

Wi-Fi Usage

Whenever possible, use Wi-Fi When there are Wi-Fi networks available, always attempt to use them rather than cell data.

Data Usage Limit

Establish a Data Cap When your data limit is met, you can set up your phone to shut off automatically.

Save Mobile Data on Android

  • Select Data usage under Settings > Network & Internet.

Save Mobile Data on AndroidSave Mobile Data on Android

  • Press Data warning & limit and Billing cycle.

Save Mobile Data on Android

Adjust the data limit so that it stays within the parameters of your data plan.

Limit Background Data

Limit Background Data for Apps Many programs make use of background data usage. This can be limited to specific apps.

Save Mobile Data on Android

  • Select Apps & notifications under Settings.
  • After choosing an app, hit Mobile data & Wi-Fi.
  • Turn off Background information. Utilize Data Saver Mode

Active Data Saver

By prohibiting apps from using data in the background and by lowering the quality of streaming services, data saver mode helps users use less data.Save Mobile Data on Android

  • Select Data usage under Settings > Network & Internet.Save Mobile Data on Android
  • Make Data Saver active.Save Mobile Data on Android

👉🏼 Exploring the Top 10 Web Browsers and Their Unique Features

👉🏼 5 Unknown for Navigating the Digital Ad Landscape with Meta Ad Manager

Only Update Apps Using Wi-Fi:

Ensure that only Wi-Fi is used for app upgrades. Google Play Store should be opened.Save Mobile Data on Android

  • In the upper right corner, tap the Profile icon.
  • Select Network Preferences under Settings.
  • Choose Over Wi-Fi only after selecting Auto-update apps.Save Mobile Data on Android

Keep an eye on or lower the streaming quality

When utilizing mobile data, reduce the streaming quality in music and video apps.

  • Check for video and audio quality settings in programs such as YouTube, Netflix, or Spotify, and select a lower quality for mobile connections.

Turn off video autoplay

Videos that social media apps automatically play might use quite a lot of data.

  • To disable autoplay for videos, go to the settings of applications such as Instagram, Twitter, and Facebook. 

Use Wi-Fi to Download Content

Before you depart, use Wi-Fi to download shows, music, podcasts, and maps so you won’t need to stream them while on the go.

👉🏼 How to find deleted WhatsApp messages

👉🏼 How to Deactivate Snapchat Account 2023

Save Maps

Save Google Maps in Your Cache for Offline Use If your navigation relies on Google Maps:

  • Launch Maps app and select Offline maps from the Menu.
  • While connected to Wi-Fi, select “Select Your Own Map” and download the necessary area.

Sync Wi-Fi only

Sync Accounts by Hand Reduce the frequency of account syncing or limit it to Wi-Fi only.

  • Select Accounts under Settings.
  • Choose the account and change the settings to reduce the frequency of syncs or disable auto-sync.

Examine Data Usage

Examine Data Usage in the Settings Check the most frequently used apps on a regular basis and, if not in use, think about limiting their access to mobile data.Save Mobile Data on Android

  • To keep an eye on app consumption, navigate to Settings > Network & Internet > Data usage.

Save Mobile Data on Android

You can save a substantial quantity of mobile data on your Android device by controlling the aforementioned settings and being aware of how much data you use.

👉🏼  How to Save Mobile Data on Android | DG Grow

FAQs

How can I reduce my Android phone’s data usage?

Enable Data Saver mode, set a limit, restrict background data, update apps via Wi-Fi, and monitor usage in settings.

Data Saver—how do I activate it?

Go to Settings > Network & Internet > Data Usage > Data Saver to enable it.

While using Data Saver, would I still receive messages and notifications?

Messages and notifications will still be received, but background data-dependent apps may not update until you open them or connect to Wi-Fi.

Can I choose which Android apps utilize mobile data?

To manage app data consumption, navigate to Settings > Apps & notifications > [App] > Mobile data & Wi-Fi and disable “Background data” or “Unrestricted data usage.”

How do automated app updates influence data usage, and how can I control it?

Automatic app updates can consume substantial data. Select “Auto-update apps over Wi-Fi only.” under Google Play Store settings.

Does lowering YouTube and Spotify quality save data?

Streaming media at lesser quality uses less data. App settings usually allow streaming quality adjustments.

How might offline maps reduce data usage?

Download maps in apps like Google Maps to browse without mobile data usage. In the app menu, pick “Offline maps” and download the appropriate areas while connected to Wi-Fi.

Can email attachments be downloaded automatically using mobile data?

It depends on your email app settings. For data savings, limit attachment downloads to Wi-Fi.

How to Add Chrome Extensions to an Android Phone

Add Chrome Extensions to an Android Phone

Google Chrome is the most popular browser for desktop computers, and it has a lot of add-ons that make it even better.

Chrome doesn’t allow these extensions by default on Android phones, though.

Add Chrome Extensions to an Android Phone

Don’t worry! It is still possible to get your favorite Chrome add-ons to work on your Android phone.

Here is a step-by-step guide for using the Kiwi Browser, a mobile browser based on Chromium:

Get the Kiwi Browser:

  • On your Android phone or tablet, go to the Google Play Store.
  • Type “Kiwi Browser” into the search bar and press the “Search” button.

Add Chrome Extensions to an Android Phone

  • Find the Kiwi Browser app in the search results and tap on it.
    After that, click the “Install” button to get the browser on your device.

Also Read:

👉🏻 iPhone 15 Series Tips and Tricks

👉🏻 Top 10 Mobile Video Editing Apps

Go to the Chrome Web Store:

  • Open up the Kiwi Browser that you just downloaded.
  • Type “Chrome Web Store” into the address bar or go straight to https://chrome.google.com/webstore.

Add Chrome Extensions to an Android Phone

  • Wait for the home page of the store to start.

Look for and install the extension you want:

  • Use the Chrome Web Store‘s search box to locate the extension you want to install.Add Chrome Extensions to an Android Phone
  • When you find the extension in the search results, click on it to go to its main page.Add Chrome Extensions to an Android Phone
  • Press the “Add to Chrome” button.

Add Chrome Extensions to an Android Phone

  • A pop-up window will show up with information about the rights the extension needs. If you agree with them, tap “Add Extension.”Add Chrome Extensions to an Android Phone
  • Please wait a little while. The app will be downloaded and put in by the browser. After the process is done, you’ll be told that the app has been added to Kiwi Browser.

Also Read:

👉🏻 30 Practical Google Chrome Extensions

👉🏻 10 reasons to buy a Mac

Take care of your extensions:

  • To see or change the extensions you have loaded, go to the Kiwi Browser’s upper right corner and tap on the three vertical dots.Add Chrome Extensions to an Android Phone
  • In the drop-down menu, choose “Extensions.”Add Chrome Extensions to an Android Phone
  • This is where you can see a list of all the extensions you have loaded. You can change how they work, turn them off, or get rid of them completely.

FAQs:

Can Chrome extensions be installed on Android Chrome?

Android Chrome doesn’t support extensions like desktop Chrome. Kiwi Browser and Yandex Browser are third-party browsers that accept plugins.

Android Chrome extensions may be installed in which browsers?

Kiwi Browser and Yandex Browser are popular Chrome addon browsers. These browsers use Chromium, the same as Google Chrome.

Do all Chrome addons function on Android?

Some Chrome extensions are meant for desktop use and may not operate on Android. Issues may arise with the interface or functioning.

How to update Kiwi or Yandex Browser extensions?

These browsers automatically update extensions when new versions are available. By entering the browser extensions menu, you may typically force an update.

Kiwi Browser or Yandex Browser support all Chrome features?

Both browsers support most Chrome capabilities, although Google-specific functionality like account syncing and service integration may not.

Android browser extensions: how do I manage or remove them?

Disable, adjust, or uninstall extensions in the browser’s extensions menu (usually in the settings or by typing chrome://extensions in the address bar).

It might seem strange to use Chrome apps on an Android phone, but browsers like Kiwi make it possible. But keep in mind that some extensions may not work perfectly on mobile because they were made for bigger desktop computers.

Make sure that any extensions you install are from developers you can trust, and always keep your safety in mind online. Have fun looking!

How to Free Up and Manage Your Google Storage Effectively

You may save up to 15GB of files, images, and other media on Google for free.

However, you won’t be able to use several G Suite apps or send or receive new emails if this is full.

With a Google One account, you may buy more storage, but before you do, you might want to remove any garbage files that are taking up space.

Although getting rid of this clutter may feel overwhelming, we’re here to help.

Now let’s explore six successful strategies:

1. Eliminate Every Unread E-Mail

A large percentage of the promotional emails that inundate your Gmail account may be illegible.

Eliminate the clutter: Check your inbox on Gmail. Choose “unread” from the drop-down option next to the checkbox, or type “is: unread” into the search field and press Enter. – List all of the unseen emails.

  • Check the box at the top to choose all.
  • Select “Delete forever” after clicking the delete button.

Manage Your Google Storage

2. Delete Previous Emails:

Emails from the past can add up and take up a lot of space.

  • Look for the email that you wish to remove.
  • After selecting it, press the Delete button.
  • Select “Delete Conversation” after clicking the “More” button next to the conversation to remove it entirely.
  • Pro Tip: Enter “before:<year>” in the search field and choose a specific year to remove old emails in bulk. Next, by selecting the checkbox and then the trash symbol, you can decide to remove all of these at once.

Manage Your Google StorageAlso Read:

👉🏻 iPhone 15 Series Tips and Tricks

👉🏻 Top 10 Mobile Video Editing Apps

3. Get Rid of Big Emails Large attachments can take up a lot of room:

  • To tailor your search, enter “has: attachment larger:10M” in the search bar.
  • Show every email that has an attachment bigger than 10 MB. As directed in the preceding section, delete these large emails.

Manage Your Google Storage

4. Set Up Google Pictures

Your Drive and Google Photos add to the capacity in Gmail.

First, get rid of duplicate photos and videos: Click on this link: Google Photos

If prompted, log in.

  • See every picture and every video arranged by date of upload.
  • Pick out any redundant files or any superfluous material and remove it.

Recall that deleted items from Google do not count toward your storage and are retained in its trash for 30 days.

5. Organize Google Drive Delete unwanted and outdated files from the drive:

Make use of Google Drive.


  • Click “Storage” on the left, then “Storage Used” to arrange files according to size. As an alternative, use the Drive’s search box and enter “size:larger:10M.
  • Click “Delete” after selecting any unneeded files.

Also Read:

👉🏻 30 Practical Google Chrome Extensions

👉🏻 How to Connect a PS5 Controller to Your Computer

6. Take advantage of Google One Storage Manager

You can control storage across Gmail, Google Photos, and Google Drive using this tool.

  • To sign in, navigate to the Google One website.
  • A breakdown of your consumption may be seen by selecting the “Storage” option.
  • Select “Manage Storage” to see the files that take up space.
  • Remove as necessary.

You may free up storage using a number of third-party apps in addition to these techniques. Gemini Photos, KeepSafe, CCleaner, and Disk Drill are a few well-liked choices.

These apps facilitate the efficient removal of big, redundant, and unwanted data by scanning for it. They also provide features like backup and encryption for photos.


Suggestion

“Never forget to manually go over your data and make sure you’re only erasing the stuff you don’t need.”

Frequently Asked Questions (FAQs)

1. How much free storage does Gmail provide to its users?

Ans – The free storage offered by Gmail is 15GB, shared among Google Drive, Google Photos, and Gmail.

2. Do deleted emails immediately free up space?

Ans – No, your delete emails are moved to the ‘Trash‘ folder. Make sure Empty the ‘Trash’ folder to free up the space.

3. Can emails be recovered once they are permanently deleted?

Ans – No, the ‘Trash‘ folder permanently removes and cannot recover deleted emails.

4. Does Gmail delete old emails automatically?

Ans – No, you need to manually delete them.

5. How do third-party apps free up Gmail storage?

Ans – Third-party apps free up storage in your Gmail account by identifying large files, duplicate files, or unnecessary data that can be deleted.

iPhone 15 Series Tips and Tricks Ways to Rise

iPhone 15 Series Tips

Check it out iPhone 15 Series Tips and Tricks! ⇓

Apple has always been dedicated to new ideas and good design, and it’s clear that they’re doing it again with the release of the new iPhone.

Fans and tech experts look forward to the yearly release of the iPhone. Each version brings a host of improvements, ranging from small tweaks to ground-breaking new features.

Let us begin with iPhone 15 Series Tips and Tricks

Recognize music – Very First iPhone 15 Series Tips and Tricks:

Press the new action button. On new iPhone 15 Pro, the mute button has been changed to the Action Button.

This button can do many things, such as turn on the flashlight, record a voice note, and open the camera.

For Siri Shortcuts, though, you can use it for a lot of great things.

One useful feature is that it works with Shazam, so all you have to do is press and hold the button to hear music nearby.

To get Shazam to recognize music, go to Settings > Action Button, scroll down to the button, and tap it.

iPhone 15 Series Tips

There is now a Shazam button for you.

There will be a Shazam music recognition image on your Dynamic Island when you press and hold it.

It will also let you know when it finds the song.


Read Also:

⇒Top 5 Wireless Earphones

⇒Open Telegram Channel

Drag more than one app into a folder at the same time:

By choosing several apps, you can quickly and easily make a folder.

You can drag an app icon by tapping and holding it, then tapping on other icons while holding it.

Once you’ve chosen all the apps you want to move, drag the group into a folder you already have and let go.

Charge to 80% Only:

One way to keep your battery healthy in the long run is to only charge it up to 80%.

iOS now has a setting for this.

To use it, go to Settings > Battery > Battery Health and Charging.

Then, pick Charging Optimization from the list that comes up.

The 80% limit should be chosen from the list.

â™  This is the most important Tips for iPhone 15 Series

Press a button to personalize sounds:

If you triple-click the side button on iOS, you can make sounds play in the background.

To begin, go to Settings > Accessibility > Audio/Vision and select Background Sounds.

Then, pick the sound you want it to make.

Now, press “Sound” and pick the sound you want from the list.

To make that sound play when you press the side button on your iPhone, go back to the list of Accessibility settings and tap “Accessibility Shortcut.

Pick a sound from the list called “Background Sounds.”

Then, triple-click the side key three times to play that sound. iPhone 15 Series Tips

Capture and Translate Text by Camera:

The camera has a feature that can read words right away when you point it at it.

When your phone sees text in the camera view, an icon that looks like three lines in a square will show up.

Click on that icon, and the text will be highlighted.

To copy, select all, look it up, translate, or share the word, just tap that icon.

You can even drag to select a certain area and use those same options on the marked text.


Read Also:

⇒ Send big file through Gmail

⇒ Pinterest Business Account

The Most Simple Way to Cut Photos in Half:

You don’t have to go through the steps to change photos;

you can just crop them on your iPhone. Choose the picture you want in Photos, then pinch to zoom until the edges touch the screen.

To make it the right size, tap “Crop” in the upper right corner or tap and hold it to pick a ratio.

Then, tap “Crop” to make it the right size.

When you’re done, tap “Done.”

iPhone 15 Series Tips

Use photos to make stickers:

With iOS 17, you can make your own stickers to send in iMessage. The Photos app lets you make them.

Choose a shot on your iPhone that has a subject in the foreground.

You can do this on your iPhone by opening the Photos app and picking a picture with a subject in the center.

Then, press and hold that subject until you see glowing lines that separate it from its background.

Finally, choose an effect and tap “add sticker.”.

Get Apple Maps Offline:

With the new version of Apple Maps, you can download certain places to use when you’re not online.

Open Maps, tap your personal picture in the upper right corner of the screen, select “offline maps,” click “download new map,” look for a place, pinch to zoom on the map to change the size of the area, and then click “Download.

Look Up Icons for Laundry Care:

In iOS 17, Visual Look Up is smarter and can recognize more than just animals, plants, and important sites.

To use Visual Look Up, take a picture of a laundry care sticker and then tap the “i” with stars in the bottom toolbar.

Then, from the pop-up menu> Visual Look Up.

This will show you what those laundry care icons on that label mean.

Make a secret button out of the Apple logo:

If you have the right settings on your phone, hitting the back near the Apple logo can take a picture or open a different app.

Accessibility > Touch > Back Tap is where you should go.

Pick one from the list of things that the double tap can do.

You can even add something for the triple tap.

Use Labels to Manage Multiple Timers:

You can set more than one timer with different names.

Open the clock, go to “Timers,” pick the time you want, change the title, and then press “Start.”

In the upper right area, tap the “+.”

Do the same thing for the next timed item.

Siri can also set more than one timer with different names.

Copy and Paste Photo Changes:

You can copy and paste changes you’ve made to one picture to make them to many others at once.

You can open a picture, change it, add effects and filters, and then save it.

In the corner, tap the three dots and choose “Copy Edits” from the drop-down menu. Then, go back to library> “Select” in the top> tap the three dots in the bottom corner> “Paste Edits.”

to style the photograph.

13. Only shoot in LOG (15 Pro/15 Pro Max):

Apple added the option to shoot in Log to the iPhone 15 Pro.

This gives color graders more color data to work with.

To test it, go to Settings > Camera > Formats, turn on ProRes, pick “ProRes Encoding,” and pick “Log.” To log, open the camera, switch to video mode, and tap “Log” in the menu at the top.

For some images and frame rates, you may need an external SSD.

When you’re ready, press the record button.

For your main camera, pick a different focal length:

You can change the focal length of your main camera on the iPhone 15 Pro from the wide 24mm that comes with it by default. To find the “Main Camera,” go to Settings > Camera.

Once you choose a normal focal length, that will be the first thing you see when you open the camera app.

Use the trackpad on your keyboard:

The keyboard on the iPhone has a mouse built in.

If you hold down the space bar while typing, the keyboard will fade out and the whole area will become a notepad.

With your thumb, you can move the cursor right to where you want to make changes.


If you dig into your iPhone and play around with the settings and options, you might find even more ways to improve your experience and make it work better.


FAQ

Are these iPhones resistant to dust and water? 

A6. Yes, both products have an IP68 classification. 

What colors do these iPhones come in? 

A7. Color options for iPhone 15 Pro and 15 Pro Max: Black, White, Blue, and Natural Titanium.

What kinds of storage space do these iPhone models come with? 

A4. Apple’s iPhone 15 Pro has storage options of 128GB, 256GB, and 512GB. You can choose between 256GB, 512GB, and 1TB of storage on the iPhone 15 Pro Max..

10 reasons to buy a Mac

10 reasons to buy a Mac

Apple’s Mac computers have been a mainstay in the tech world for decades, with a strong following of loyal users and unique features.

These 10 strong reasons should make you think about buying a Mac instead of a PC if you’re still not sure.

1. Craftsmanship – Design and Build Quality:

Apple is known for paying close attention to design and build quality. Not just a machine, a Mac is a work of art that was carefully made. Apple makes sure that every part, from the sleek metal body to the retina displays, works well and looks good.

10 reasons to buy a Mac

2. The operating system macOS – Integration:

The macOS works well with other Apple products. For example, Handoff lets users start a job on their iPhone and finish it on their Mac. – Stability: Unix, which macOS is built on, is known for being stable and stable. This means that the system will crash and freeze less often.

3. Security and Privacy-Malware Resistance:

Macs have historically been less likely to get bugs and malware than PCs.

  • Measures of privacy: Apple puts a lot of thought into protecting users’ privacy. To do this, they offer features like app-specific rights and regular software updates.

4. Ecosystem that works together

  • Seamless Synchronization: iCloud makes it easy for Apple users to sync pictures, documents, and other files between all of their Apple devices.
  • Continuity Features: With the continuity suite of features, you can answer calls, see text messages, and copy and paste between devices.

5. Performance and Optimization:

  • Tailored Hardware and Software: Apple handles both the hardware and software of Macs, making sure they’re set up to work well together. This usually leads to smoother operation and devices that last longer.

6. Help and support for customers – AppleCare:

Apple provides a full warranty and support service to make sure your gadget gets the best care.

  • Genius Bar: Trained tech experts are available at Apple Stores all over the world to help with any problems.

7. Resale Value – Holds Value:

Macs usually have a better resale value than PCs. This means that you can get a big chunk of your money back if you decide to switch or improve.

8. New and Interesting Features

Some MacBook Pro models come with a Touch Bar, which is a flexible touch screen strip that takes the place of function keys and gives you access to controls that are more relevant to the situation.

  • Force Touch Trackpad: This feature makes navigation easier by giving you controls that respond to pressure and haptic input.

9. Friendly to the environment – recovered Materials:

Apple has done a lot to use recovered materials in their products, which helps the environment.

  • Efficiency in using energy: Macs are made to be energy-efficient, which means they use less power and lower your electricity bill.

10. App Store and Software Suite – Bundled Software:

Every Mac comes with a set of artistic and useful programs, such as iMovie, GarageBand, and Pages

  • Quality Apps: The Mac App Store has a carefully chosen set of apps that make sure users get the best software for their needs.

In the end

Picking between a Mac and a PC will always be personal and rely on your needs. However, Macs have design, performance, and ecosystem advantages that many people find appealing. If you care about looks, safety, or how well your gadgets work together, a Mac might be a good buy.

Helpful guides:

Unleashing the Power of ProtonMail Account | Your 6 Step Guide to the World’s Best Free Encrypted Email Service

Two Fastest Ways to Download Instagram Videos 

Most Effective Method For Facebook Verification | You Are 7 Steps Away

Top 5 Wireless Earphones at the End of 2023

Top 5 Wireless Earphones

Wireless earphone manufacturers have never been more innovative. Brands have seamlessly merged top-notch sound quality with cutting-edge features to deliver an unparalleled audio experience as we march ahead into 2023.

The top 5 wireless earphones of the year include giants of tech and stalwarts of sound.

MagSafe Charging Case (USB-C) for Apple AirPods Pro (2nd Generation)

Top 5 Wireless Earphones

Overview

Apple’s immensely popular AirPods Pro has a successor in this 2nd generation model, which introduces new features while retaining its iconic design.

The key features are:

  • Adaptive Audio.
  • Active noise cancellation.
  • Enable transparency mode.
  • Dynamic head tracking enables personalized spatial audio.
  • Aware of the conversation.
  • Control touch.
  • Water, sweat, and dust resistant along with a charging case.
  • Up to 6 hours of listening time.
  • With the charging case it’s up to 30 hours of listening time.
  • Switching automatically to personalize the engraving.

Why does it stand out?

Many Apple device users favor Apple’s seamless integration with its ecosystem and the convenience of MagSafe charging.

Bose QuietComfort Ultra Earbuds

Top 5 Wireless Earphones

Overview

Bose delivers an oasis of sound in any environment by extending its expertise in noise cancellation to its earbuds.

The key features are:

  • A single charge provides 6 hours of battery life.
  • Case contains an additional 3 charges.
  • We tailor sound in three steps.
    1. They analyze your ears’ unique shape.
    2. They can adapt to any distortion.
    3. Continually provide you with the highest sound quality, they personalize.
  • It cancels noise at a world-class level.
  • The phone calls are the clearest.
  • The user’s text is already in active voice.

Why does it stand out?

It is perfect for those who want to lose themselves in their music or make clear calls in noisy surroundings with its unmatched noise-cancelling capabilities.

Sony WF-1000XM5

Top 5 Wireless Earphones

Overview:

The WF-1000XM5 from Sony shines bright in sound technology, showcasing both functionality and fidelity.

The key features are:

  • The maximum music hours are 8 (with NC ON) and 12 (with NC OFF).
  • The maximum communication hours are 6 (with NC ON) and 7 (with NC OFF).
  • The Bluetooth Specification Version 5.3 supports Multipoint Connection. Adaptive Sound Control adapts sound.
  • It is equivalent to WATERPROOF IPX4.
  • The ambient sound mode for cancels noise.
  • Quick attention to cancels noise.

Why It Stands Out:

Sony stands out with its signature sound profile, which combines with adaptive features to make it a versatile choice for various settings, from commutes to workouts.

Anker Soundcore Liberty 4 NC:

Top 5 Wireless Earphones

Overview

Anker surprises by offering premium features at a mid-range price point, with the Liberty 4 NC standing as a testament.

The key features are:

  • Noise cancelling technology to reduce unwanted background noise.
  • It adapts to ears and environment.
  • The 11mm driver is custom-made for sound.
  • HearID Sound has a playtime of 10 hours out of 50 hours.
  • Bluetooth 5.3 enables.
  • Faster charging 4 hours equals 10 minutes.
  • Wireless charging also available.
  • 6 mics with an AI algorithm for calls.

Why does it stand out?

Those who seek a balance between cost and quality often choose it as the go-to option, as it delivers features often seen in higher-end models.

Shure Aonic 215 (Gen 2)

Top 5 Wireless Earphones

Overview

Shure, a brand synonymous with studio-quality sound, showcases its prowess in the wireless earphone market with the Aonic 215 Gen 2.

The key features are:

  • Clear sound and deep bass create awe-inspiring,
  • True wireless audio.
  • IPX4 is sweat and water resistant.
  • It isolates sound up to 37 dB.
  • There is an environment mode.
  • The total battery life is up to 32 hours.
  • The connection is detachable.
  • Press the onboard button to execute commands.
  • The ShurePlus™ PLAY App utilizes Bluetooth 5 wireless technology.

Why does it stand out?

Purists will appreciate the treat of combining the flexibility of both wired and wireless use with Shure’s renowned sound signature.

In 2023, the wireless earphone market blends luxury, innovation, and exceptional audio quality. There is something out there tailored for your needs, whether you prioritize noise cancellation, sound quality, battery life, or the overall ecosystem. Dive into the world of wireless audio, and experience unmatched clarity as you enjoy every beat, rhythm, and note.


Guide For You:

How to Easily Backup and Restore WhatsApp Messages

Novelty Shopper’s Guide: How to Use Instagram Shopping

How to Remove Your Canva Account Perfect Guide