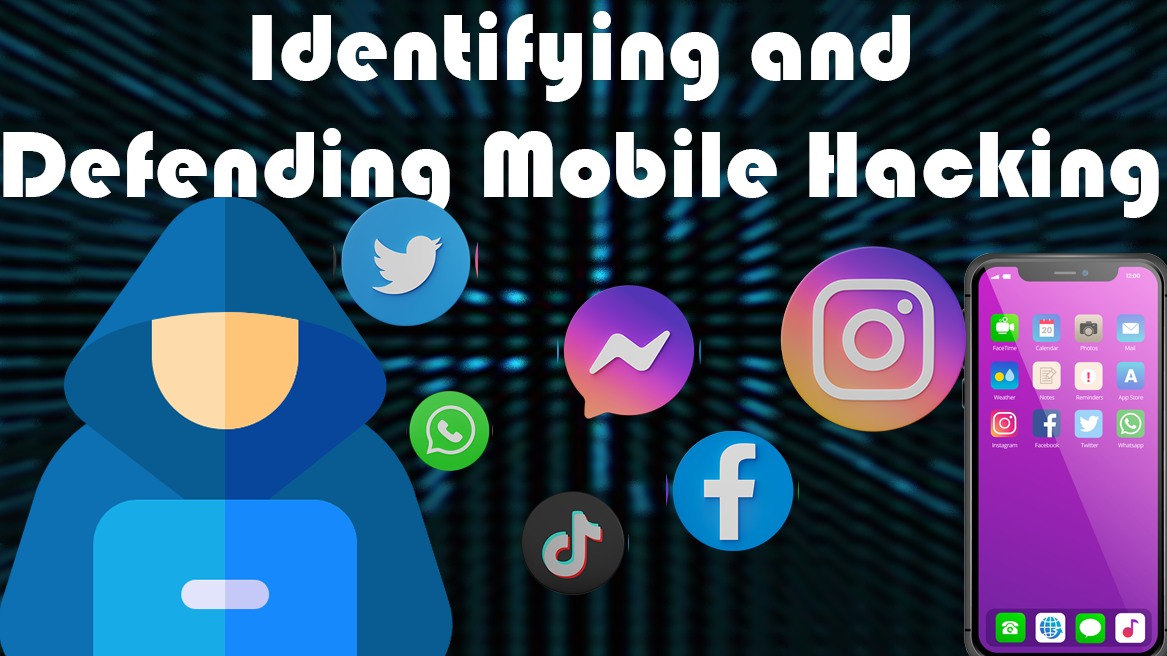
Securing Digital Privacy: Identifying and Defending Mobile Hacking
Securing our mobile devices is more important than ever in a time when they have evolved into extensions of ourselves and are loaded with private and sensitive data.
This article explains common indications that a mobile device has been compromised and offers a thorough, step-by-step Identifying and Defending Mobile Hacking and restore your device’s security.
Identifying and Defending Mobile Hacking
“Rapid Battery Depletion”
Identification:
“A quick, inexplicable decline in battery life”.
Solution:
- Check the settings for any unexpected applications that eat up battery.
- Remove suspicious or pointless programs.
- To find malware, install a trustworthy security system.
“Sluggish Performance”
Identification:
“Atypical lagging or device freezing”.
Solution:
- Delete the browser’s cache and history.
- Remove any applications you don’t remember downloading. If persistent, back up data and perform a factory reset.
“Elevated Data Usage”
Identification:
“An unusual rise in data usage”.

Solution:
- Examine data use in the settings to find malicious programs.
- Uninstall apps with excessive data consumption.
- Turn on data limit settings to keep an eye on usage.
“Unauthorized Transactions”
Identification:
“Strange purchases or messages”.
Solution:
- Change the passwords for all sensitive accounts.
- Two-factor authentication must be activated.
- Keep an eye on accounts and notify your bank of any fraud.
“Unfamiliar Apps Appearance”
Identification:
“Discovering apps you didn’t install.”

Solution:
- Remove these apps immediately.
- Upgrade the operating system on the gadget.
- Modify passwords and activate security measures.
“Settings Modification”
Identification:
“Changed or inaccessible device-Settings”.

Solution:
- Return to the default configuration.
- Make all password updates.
- Download a reliable security app to keep an eye on changes.
“Irregular Pop-Ups”
Identification:
“Observing repeated pop-ups or ads”.

Solution:
- Put in a reliable ad blocker.
- Steer clear of strange links or advertisements.
- Update browser settings for increased security
“Mysterious Emails or Messages”
“Identification:
“Items issued that wasn’t authorized by you”.
Solution:
- Immediately update your app and email passwords.
- Two-factor authentication should be enabled.
- Regularly review and keep an eye on specified issues.
“Device Overheating”
Identification:
“Is defined as a device heating up without being put to heavy use”.

Solution:
- Check for any apps which are unfamiliar but currently running in the background.
- Get rid of suspicious applications.
- Always keep the software on your device updated.
“Background noise when on the phone”
Identification:
“Hearing odd noises or echoes”.

Solution:
- Refrain from answering ominous or shady calls.
- Keep track of and examine call logs.
- Modify your phone number as necessary.
The close bond that people have with their mobile devices in the modern digital era emphasizes the necessity of strict security measures. Recognizing the warning signs of a potential cyberattack and taking proactive measures to reduce the risks become essential. Your mobile device requires a fortified sanctuary of privacy and security as a repository of sensitive and private data. Each user may turn their device into an impenetrable fortress of digital security, where personal data resides, secure, and untouchable, by remaining alert, informed, and up to date.
Jump To:
2 Easy Ways to Save WhatsApp Photos and Videos to Your Phone Gallery
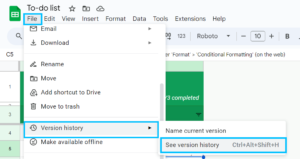
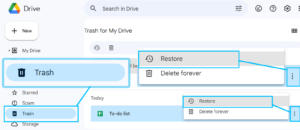
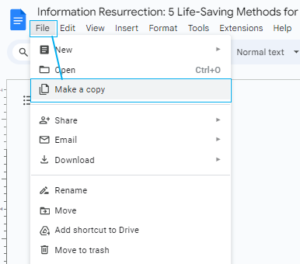
5 Remarkable Methods for retrieve deleted data and restore data on Google Sheets
05 Perfect ways to Effectively Block Spam Messages on Instagram


 All incoming media will be instantly saved to your phone’s gallery.